How to configure OBS for game capture
When you install OBS it will not be setup to work unless you adjust the settings. This is quite easy but if you are not sure these steps may help you get it up and running (Run OBS in Administrator mode to overcome any issues).
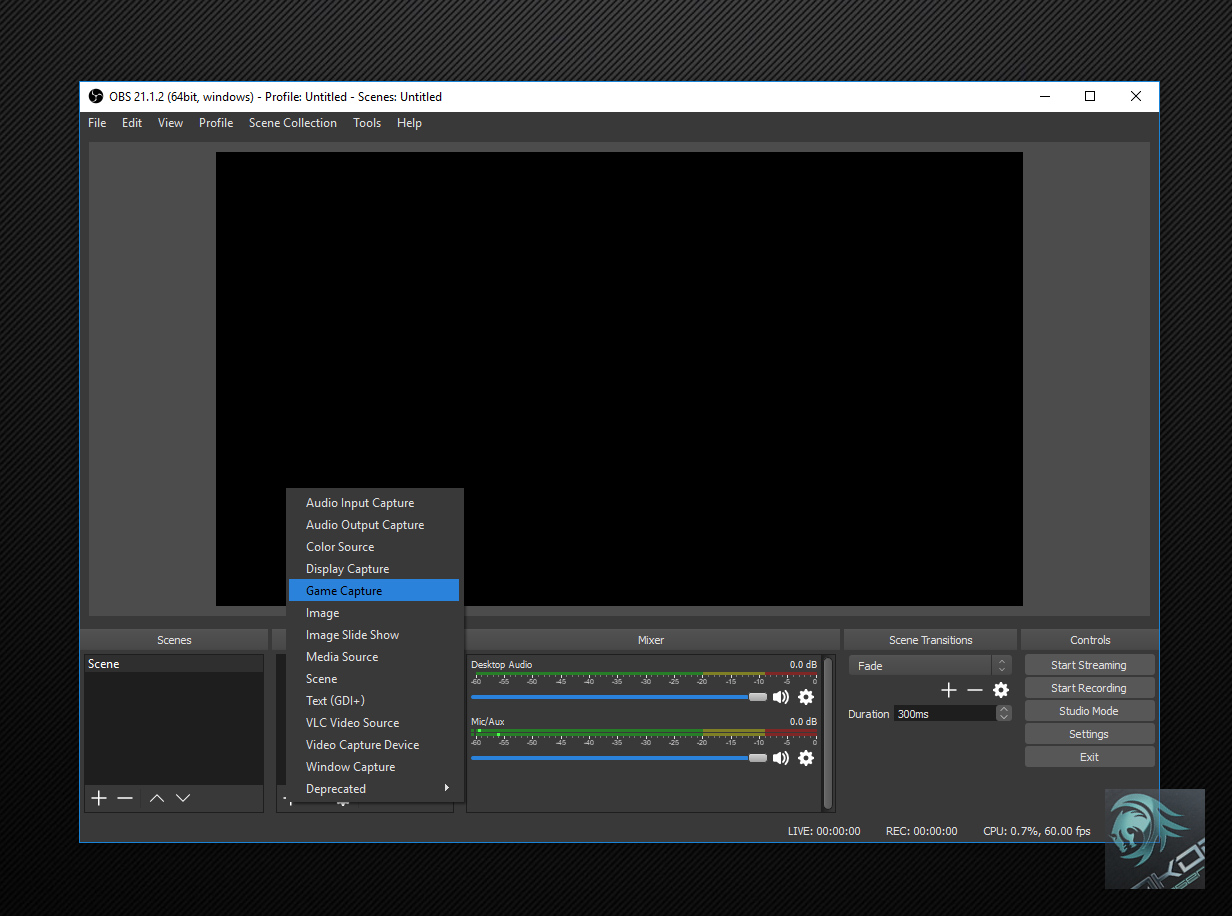
First you need to add a capture source, press on the + sign to add one.

Here you will see a new menu with a few options, choose game capture.
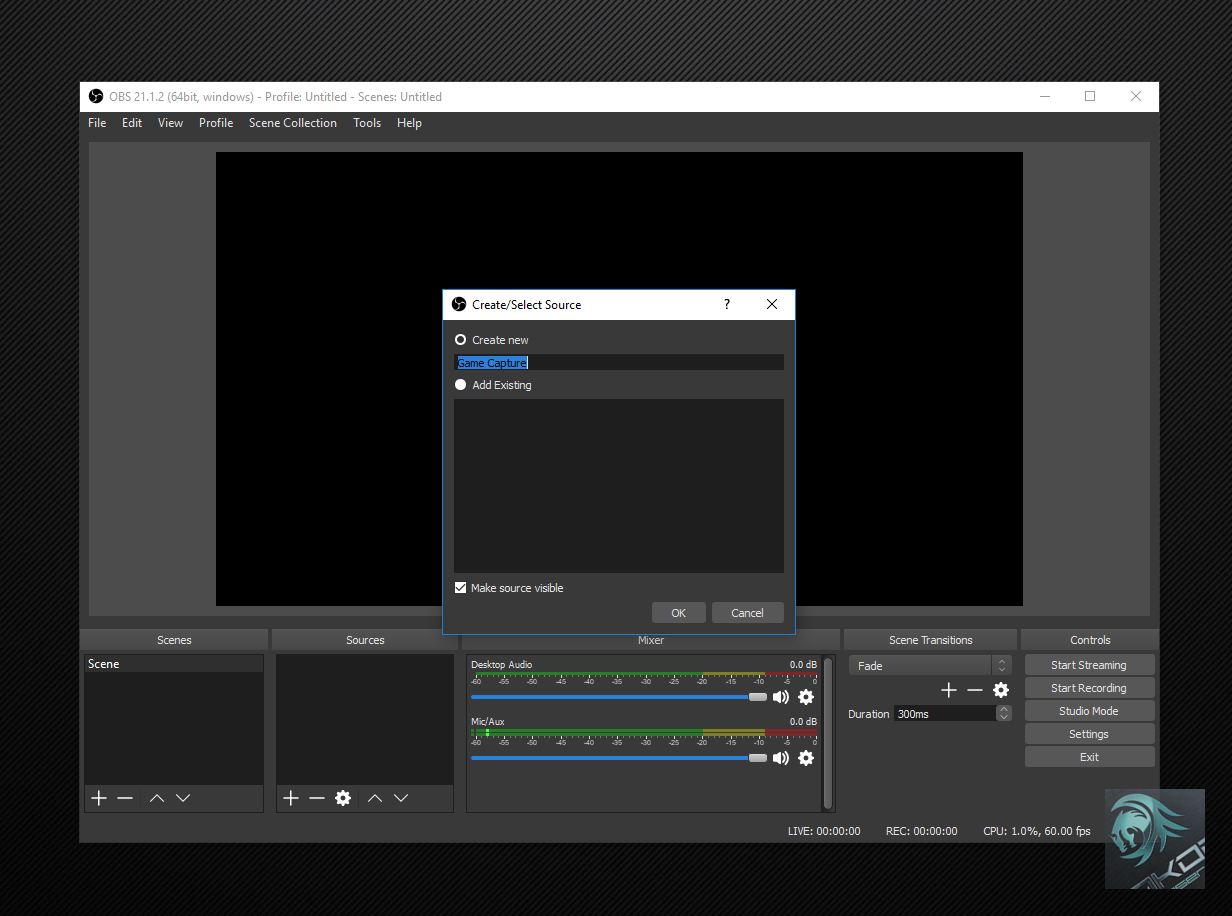
Specify a name then click on the OK button
Capture any fullsscreen application
Now you will be asked to set the capture mode, for the easiest option choose capture any fullscreen application, then OK.

Capture specific window
If you would like to choose a specific window (game) to record you can do so but you must make sure the game is actually running so that OBS can detect the game exe and allow you to choose this in the settings page. Once you choose the game exe a small preview will also appear to confirm functionality.

Once you have made your capture window selection it will take you back to the main window, now you need to adjust some settings to get it to work, press on the settings button.

General Settings

This can be left alone but you may find some options here useful such as minimising OBS to the system tray.
Output Settings

For more options change the output mode to Advancded then select the recording tab to specify your options.
- Recording format, MP4, MKV…
- Always tick Audio Track 1
Encoder, depending on your hardware this will vary. I am using an Intel i7-6700K CPU which comes with an integrated GPU, Intel HD530. This has a built in hardware H.264 encoder aka Intel QuickSync.
- Intel GPU hardware encoder = QuickSync H.264
- Nvidia GFX cards hardware encoder = NVENC.
- AMD GFX cards hardware encoder = H264 AMD Advanced Media Framework (AMF/VCE)
- CPU software mode = H264. (slows down performance)
The other settings will also depend on your encoder choice so play around with the settings to determine what provides you with the best results. Generally speaking CBR / VBR are the basic options and will not provide you with the best video recording quality.
Audio Settings

Video Settings

Hotkeys Settings

Advanced Settings

Once done try a game and you should see the preview window showing what it will capture.

To reduce CPU usage the preview can also be disabled.

Leaving you with this window.

Now you should have a working OBS set up but please note sometimes you need to run OBS in Administrator mode for it to actually function correctly.

What are you recording and considerations
Local recordings allow you to capture your gameplay at higher settings so it will look clearer / less pixelated. This does have limitations depending on your hardware, file size can get large for over an hours worth of footage. The game you are playing also influences the file size and Bitrate / Encoder options. Slow paced games with minimal textures do not require as high of a bitrate Vs games with fast moving, high textures / high density foliage. (trees / grass / highly detailed environments). If you find the right encoder options this will work well for both scenarios just expect the higher detailed game recording to eat a lot of storage.
Where are you going to save the recordings?
For best results use a hard drive that is not being used, dedicate a drive for recordings to reduce stutters.
Video editing software
Is a must as you may want to delete, cut or edit the raw footage. I choose to record at my native monitor resolution, 1920×1080@60fps. For uploading and playback on YouTube you will see better results at 1440p or above <software can be used to upscale the video.
Sound echo when playing captured videos
This can happen sometimes, try lowering the Mic/Aux volume slider in OBS.
Recordings are not smooth with choppy playback
- Check your CPU usage when gaming / recording
higher than 80% will start to cause your PC to slow down.
- Check your GPU usage when gaming / recording
higher than 75% will start to cause OBS to slow down.